The Brewing Process
For the experienced home-brewer, the contents of this page will not contain anything new. But if you are new to brewing, you will find a step by step description of the brewing process. Summarised: we start with malt (grain that went through some modifications), hops, water and yeast. The purpose of the brewing process is to extract the starch from the grain and to transform it into fermentable sugars. These sugars are converted by the yeast into alcohol and carbon dioxide. And if you do that in a proper way, you end up with a tasty beer that usually outperforms any commercial beer.

The brewing process consists of the following phases:
Milling
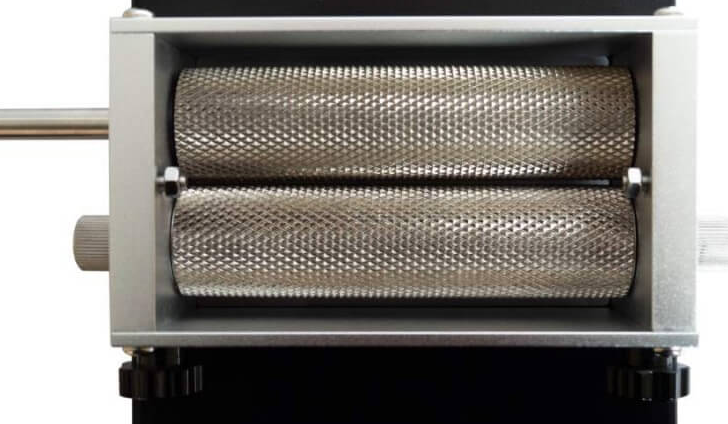
The grain is milled with a grain mill. Milling should be done as rough as possible. The chaff should remain intact as much as possible (better filtering). The grain body is cracked a little for easy dissolving into water. If you mill very fine, you can have all kinds of trouble with filters that get clogged. Milling is done with a grain-mill (see picture). The home-brewer has to have a grain mill. It is one of those attributes that you can not do without. In a shop they only sell un-milled grain, because it deteriorates quickly. I usually mill my grain about 1 hour before I start mashing.
Mashing
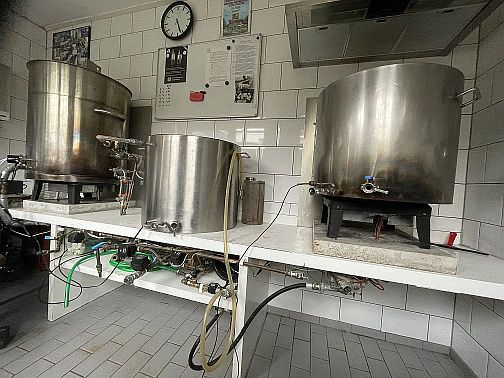
After milling you end up with a lot of milled grain. In my case I usually mill about 10-15 kilos. At the same time I light the burner under the Hot Liquid Tun (HLT), and fill it completely with fresh water. I'll heat it until the temperature equals 63° Celsius. Next I pump about 80-85 litres of water from the HLT in the Mash / Lauter Tun (MLT). Then it is time to add the milled grain to it. Stir well but gently. If you do this too rough, you may oxidise the beer (I never experienced anything like that, but I don't want to take a risk here).
In How does it work? I do explain how mashing is done with my brewing setup. The amount of mashing water is usually fixed. Per kilogram of grain I use 4-5 litres of water for mashing. During the mashing phase, it is important to stick to your mashing scheme. This is a temperature-time trajectory. I typically use a scheme that looks like the following:
| Temperature (° C) | Duration of Rest (minutes) |
| 63° C | 30 minutes |
| 73° C | 20 minutes |
| 78° C | 5 minutes |
This means that after every rest the burner is ignited again and the water is heated with approx. 1° C/minute until the next temperature is reached. Especially in the beginning it is difficult to achieve and control these temperatures. It is important to control this as good as possible, but in the past I have made several errors here. It has never resulted in an undrinkable beer. But if you want to achieve some reproducibility, you need to have this under control. In the beginning I tested the result with an iodine solution, but with the mashing scheme defined here, it is not really necessary. The iodine test is done to see if all the starch has been converted into (un)fermentable sugars.
Sparging
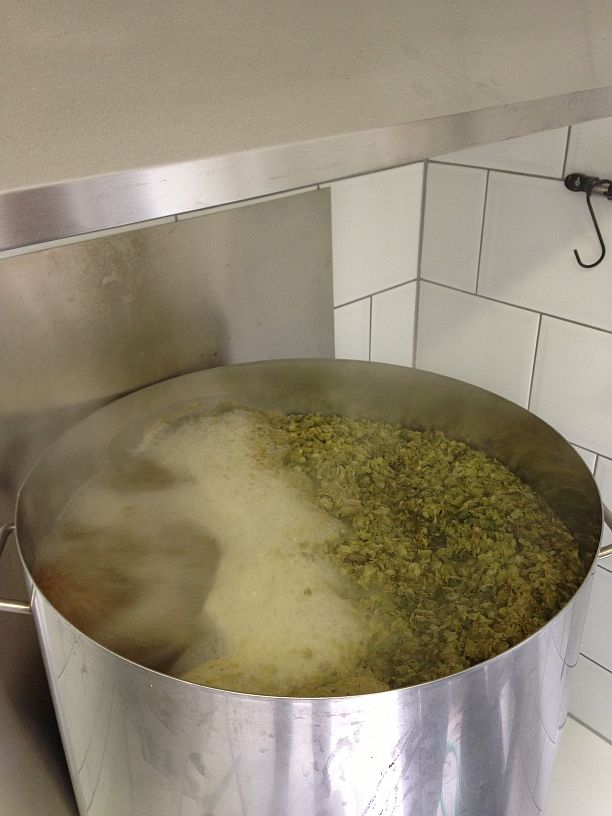
After the wort temperature has achieved 78° C, it is time to start sparging. I collect the wort in the boil kettle. Then I add sparging water (of 78° C) to the wort. What we are doing is to sparge the sugars from the grain. The grain (which is at the bottom of the mash/lauter tun) serves as a natural filter bed. The pump sucks the wort from the bottom and re-applies it at the top of the filter bed. I normally add all the sparging water in 3-4 times. The entire sparging process does take approx. 2 hours. If you rush this, you'll end up with a low brewing efficiency (less sugars = less alcohol, poor taste). During sparging I take care that the grain bed does not fall dry. The amount of sparging water is determined by the recipe and the kind of beer that you want to produce. As a rule of thumb I use 2 litres of sparging water per kilo of grain. This results in a beer with an alcohol volume percentage of about 6 %. For a strong beer I use a bit more litres of sparging water, depending on the specific recipe. Sparging is done in a special way in my brewing setup. See How does it work? for details. After sparging, the boil kettle is full with about 100-110 litres of wort. Already during sparging I light the burner under the boil kettle and add most of the hops. I always try to get this to a boil when I have finished sparging.
Boiling
The collected wort has to boil vigorously now. About 10-15 % of the volume should vaporise (no lid on the boil kettle!). If you use hop pellets, use a five minute rest after boiling, before switching the pump on, otherwise your filter may become clogged (and that is really problematic when you have 80 L of wort of 100° C). The total boiling time varies, depending on the recipe, but is usually set to 60 minutes. Because I now have a large boil kettle, the risk of overflowing (losing all your hop at once, problem, problem) is minimal. Best is to have a rolling boil, not too wild. With the current boil-kettle the evaporation rate is about 12 liters per hour. I also have a Grainfather 25 L brewsystem and that one has an evaporation rate of 2.4 liters per hour.
Chilling
After the (now sterile) wort has boiled, it is time to cool this as fast as possible. If the temperature drops below 60° C, the wort becomes easily contaminated with bacterial infections (and if that happens, you have to throw it all away). So make sure you sanitise everything (such as the fermentation bin). Work as cleanly as possible now. Chilling the beer is either a pleasure to do or a complete disaster. I used to chill with an immersion chiller that I placed in the boil kettle. Through this chiller cold water was flowing. That will take approx. an hour to chill the beer, you may burn your fingers, your glasses become steamy and so on. Currently I created a so-called Counter-flow chiller, which chills all the wort in about 5-10 minutes. And it is in the fermentation bin at the same time! And it doesn't get into contact with air anymore. This is one of the best gadgets I ever made, thanks to all my fellow home brewers on the Internet that gave me suggestions how to build this.
Fermentation
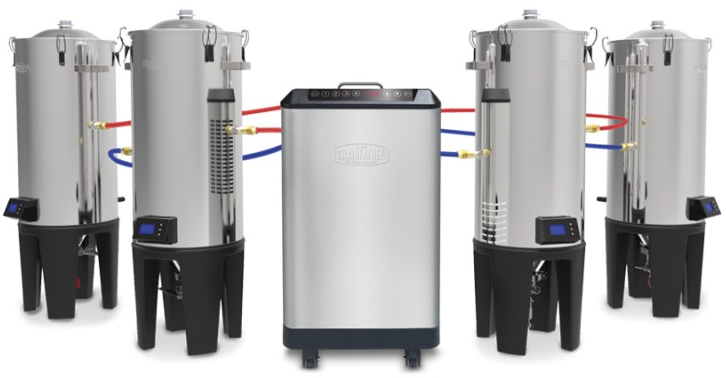
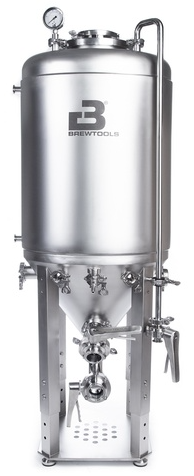
Now that the beer is in the fermentation bin (picture), the yeast can be added. Many books claim to first aerate the wort, since the yeast needs oxygen to start. It is a lot of hassle to do, since you have to sanitise the air pumps and the hoses. I never experienced much difference in yeast growth, so I don't bother anymore. During chilling I plunge the (cooled!) wort into the fermentation bin, so it is aerated to some extent. Over the last few years, I invested in conical fermenters: I currently have four Grainfather conical fermenters and one Brewtools F100 Unitank.
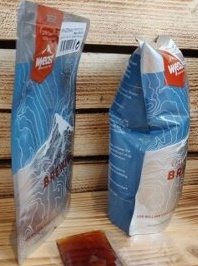
After this, I add the Wyeast yeast. I usually create a yeast starter, so that the yeast is already quite active when I add it to the fermentation bin. Many books state that the wort should now be aerated for at least 2 hours. I normally do this only for high-gravity beers. It is a bit of extra work, since you have to make everything sanitized.
Yeasting starts slowly. After approx. 12 hours a layer of foam is visible on your beer. Fermentation remains heavy for a few days. The total fermentation time depends of the type of beer and the yeast used, but is something between 2-6 weeks. Many brewers siphon the beer after a few days to another bin for lagering.
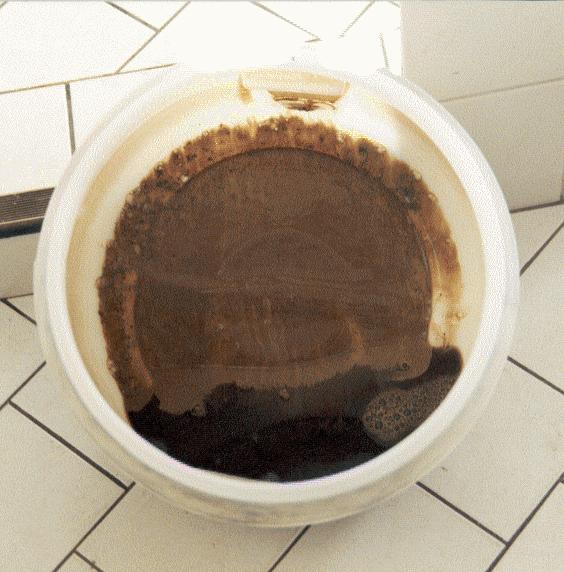
To make sure that bacteria have no access to the beer, an air-lock is used to seal off the fermentation bin. It only allows the carbon dioxide (produced by the yeast while converting sugars into alcohol) to escape. The picture here shows what remains in the fermentation bin after siphoning. It consists of dead and living yeast cells. Normally I throw this away and I clean the fermentation bin thoroughly.
Bottling
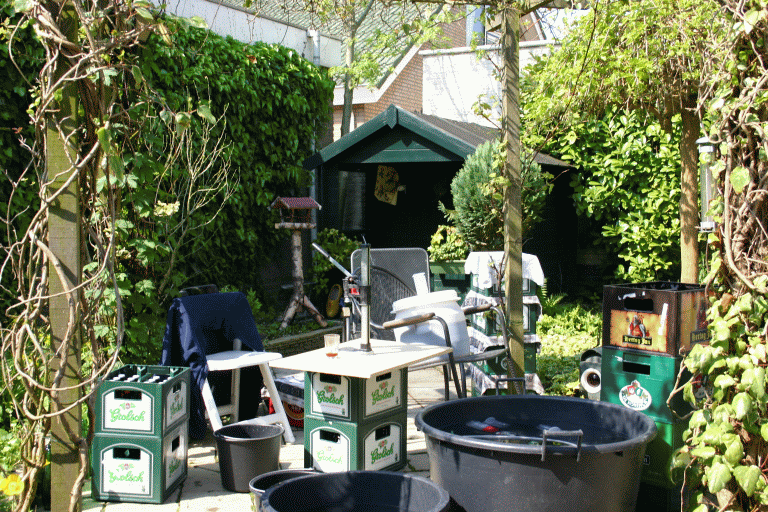
Bottling is the last and most cumbersome activity of the entire brewing process. If the air-lock does not show activity anymore, I siphon the beer into bottles. The trouble is that every bottle has to be thoroughly sanitised. I use a large cement-tub for this (the black tub in the picture). I fill it with hot water, add a Chloride solution and leave the bottles in here for about 30 minutes. Then I rinse them with clean water. To bottle 80 L of beer, I need 270 bottles of 0.3 L, which is already a lot. Therefore the cement-tub is convenient, since it can hold a lot of bottles. The picture shows an overview of our "bottling unit", which is ready for use. In the middle, you can see the crown capper and in the background, there's a fermentation bin ready for bottling.
I add a bit of sugar to every bottle prior to siphoning. Then I place a crown cap on top of the bottle and I use the crown capper to seal the bottle. The remaining yeast will be activated again (because of the added sugar). It will produce alcohol and carbon dioxide again. But this time we are interested in the carbon dioxid, since it now pressurises the bottle. The bottles I use most often are the 0.5 L bottles. The beer is stored for 6-8 weeks in my cellar. The longer you wait, the better the result. Some beers (like a white beer) are enjoyable after only 4 weeks, others (like a 'Trappist') need at least 8 weeks.
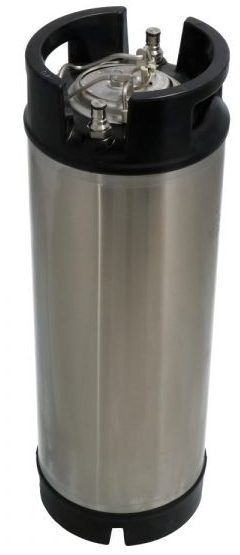
I currently have a beer tap with five taps. So most of the time, I bottle my beer directly into a so-called soda-keg. These soda-kegs contain 19 liters and can be connected directly to my taps. Only the remaining beer is still bottled in bottles. After filling a soda-keg, I put carbon-dioxide (CO2) pressure of 3 bars on it (temperature of 6 °C) and roll it for 4 minutes. After this, it is pressurised sufficiently and you can have a beer from the tap.
Tasting and Drinking!
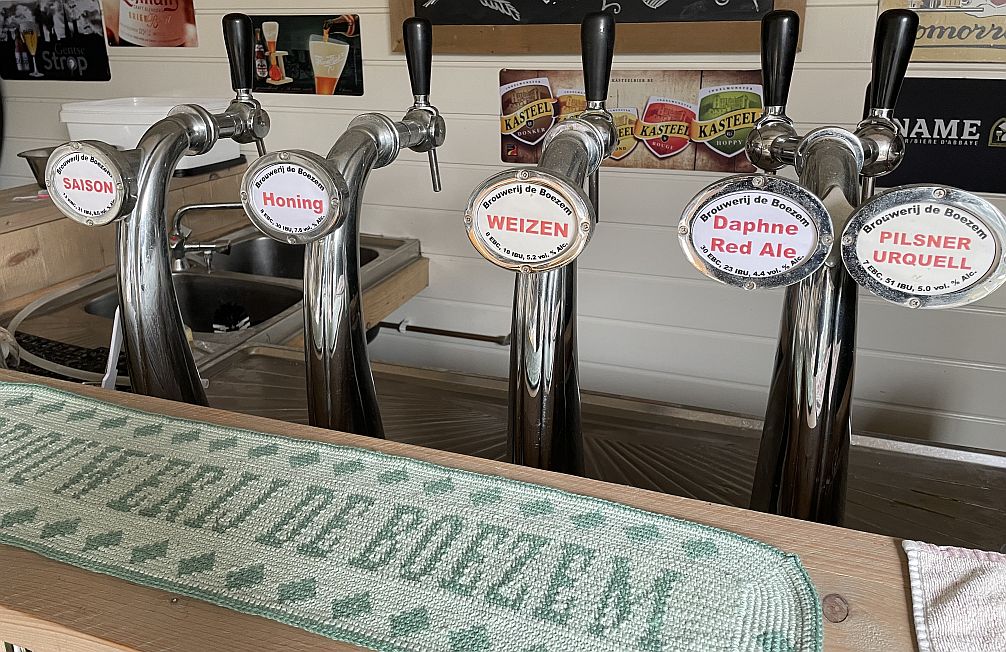
This is one of the phases that I enjoy most: tasting your own home-brewed beer. I have to admit that most beers are better than the ones you buy in the shops. Of all my brews I only had one failure (Irish Stout, added too much chocolate malt which made it too bitter). It is becoming even more fun if your wife, your neighbours, your family and your colleagues appreciate your home brews. It still amazes me how fast 80 L of beer can be gone. What are the favourites? My wife likes the IPA, the neighbours like the Blond, my son the hefeweizen and the Pilsner Urquell is my favourite. I make it a habit of cleaning the bottles after drinking, so that I store them already clean. This saves a lot of work when doing the sanitising prior to bottling. The soda-kegs are even easier to clean, since they remain pressurised after use. So there's no contamination, only some beer residue.
Back to Top